If you already created your booking calendar and learned how to share it with clients, the next step is making sure it reflects your brand, your availability, and your business needs. In this guide, you’ll learn how to customize booking calendars in TwiLead like a pro, including appearance, availability, notifications, buffers, payment settings, and more.
By the end, you’ll have a fully optimized calendar ready to convert visitors into booked appointments.
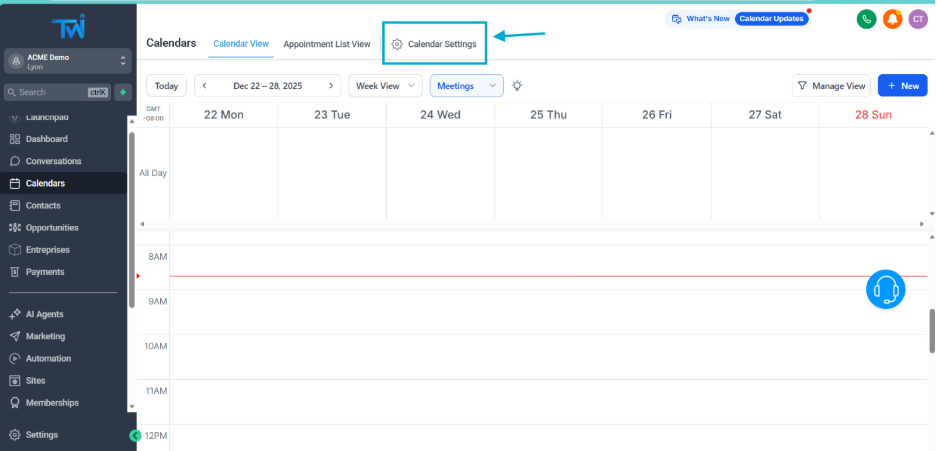
1. Open Your Calendar Settings
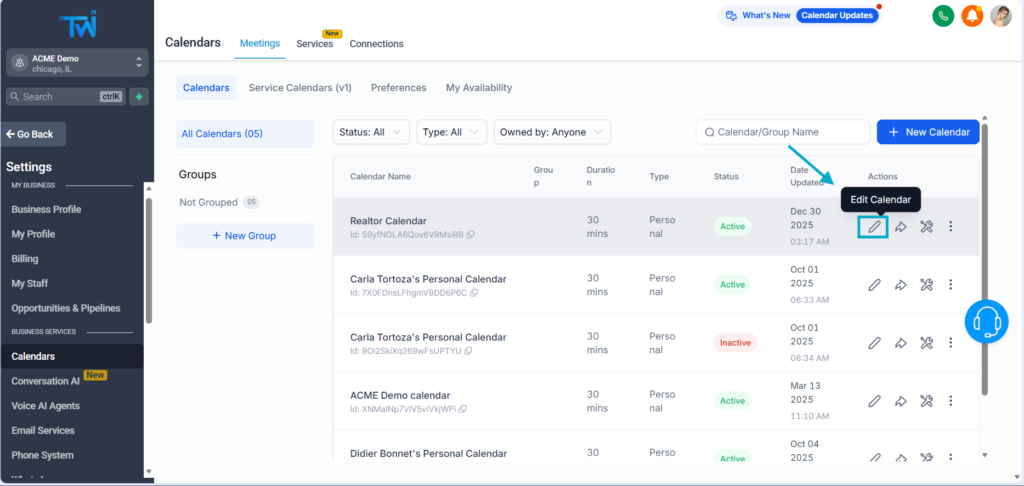
From the Calendars section in TwiLead, click on Edit Calendar next to the calendar you want to customize.
This will take you to the main customization dashboard.
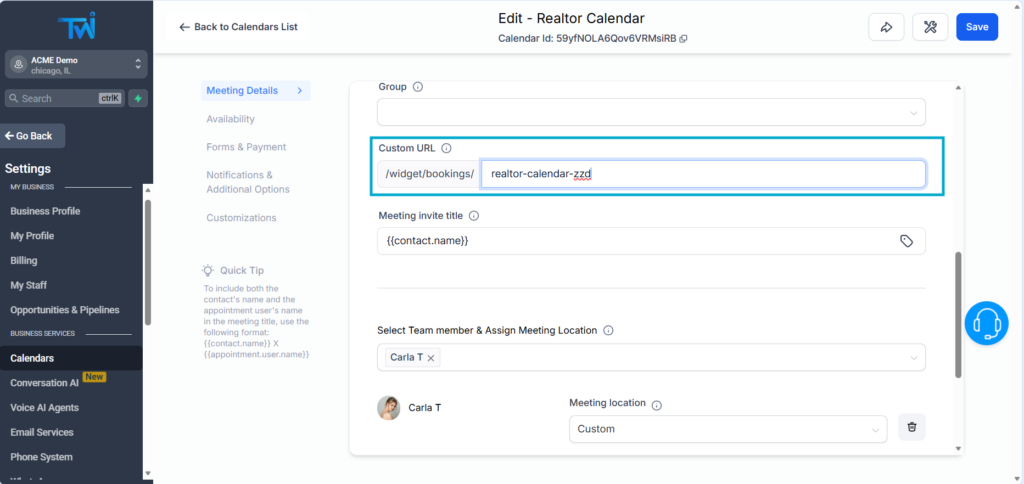
2. Customize General Settings (Logo, Name, Description, URL)
Inside Meeting Details, you can personalize the basic details:
Add Your Logo
Upload a logo from your computer and choose if you want it displayed in a circle or square shape.
Edit Calendar Name & Description
- The name is internal and helps you stay organized.
- The description will be visible to your clients. Use it to set expectations or add a short message that matches the goal of the meeting.
Customize the URL
You can modify the calendar URL to make it cleaner and more professional.
Calendar Members
For personal calendars, you cannot add additional members.
To include multiple team members in a rotation, you must use a Round Robin Calendar.
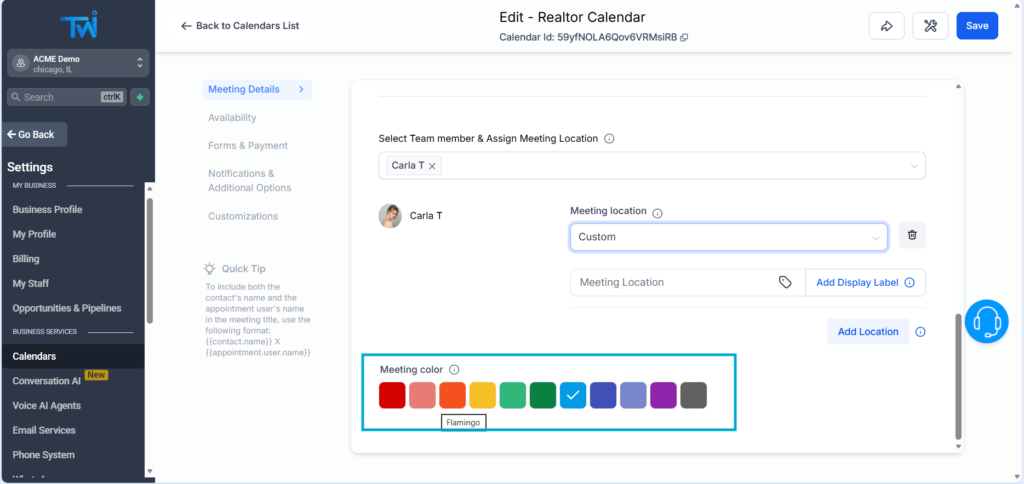
Choose the Meeting Location
In the Location field, select how the appointment will take place:
- Online: Zoom, Google Meet, phone, etc.
- In Person: Add a physical address.
- Let the client choose: You can offer multiple options, so the client can choose what is the best fit.
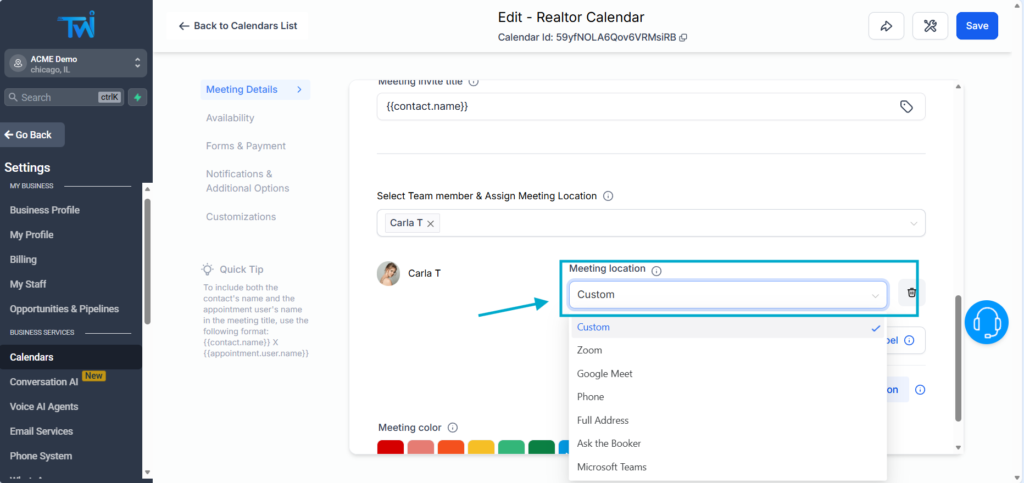
Pick Your Calendar Color
Set the display color of your calendar so it matches your brand identity.
3. Customize Availability
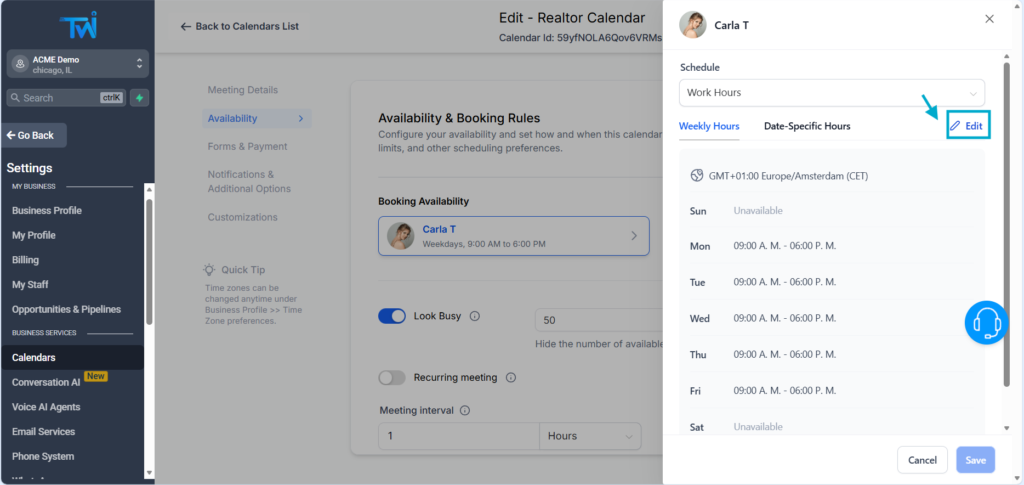
This is where you define when clients can book appointments. You need to go to Availability, then click on your user, then on Edit.
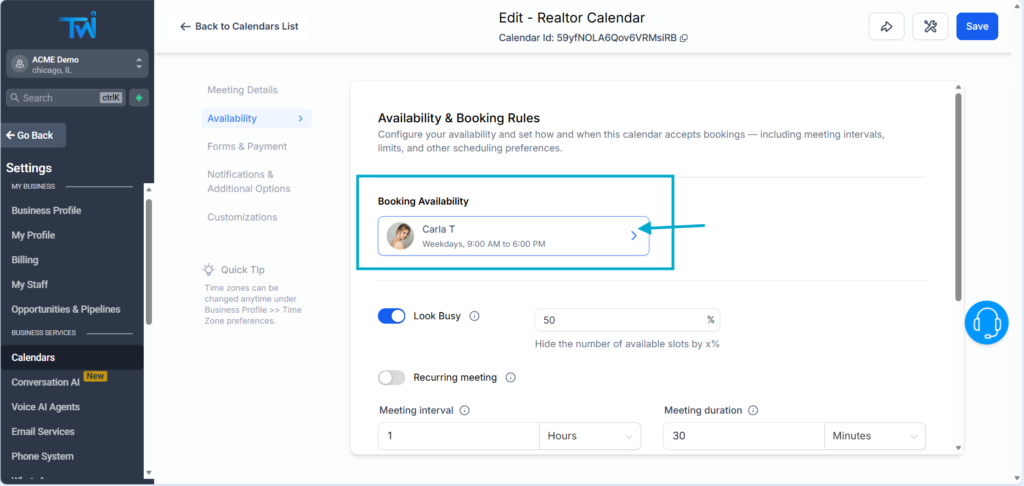
You can:
- Adjust weekly availability (e.g., Mon–Fri, 9 am–6 pm)
- Disable days you don’t work
- Add exceptions
- Apply changes only to this calendar or to all future calendars
TwiLead instantly updates your live calendar when you make changes to your availability.
Use Buffer Times (Preparation & Cooldown)
You can add buffer times:
- Prior Time: Extra time before a meeting (e.g., 15 minutes to prepare).
- Poster Time: Extra time after a meeting (e.g., 10 minutes to write notes).
This helps reduce back‑to‑back burnout.
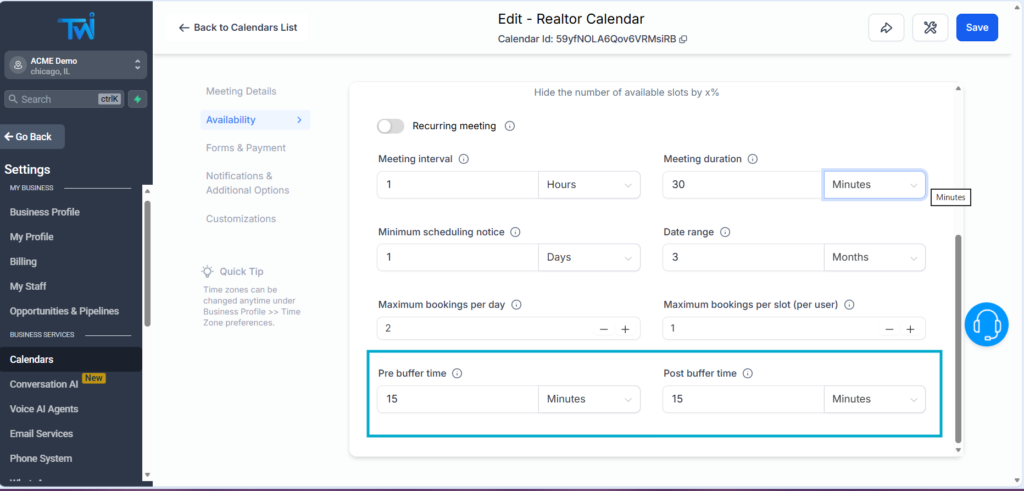
Adjust Interval Between Available Time Slots
This determines how often a time slot appears in the booking calendar.
For example:
- 30 minutes → 2:00 pm, 2:30 pm, 3:00 pm…
- 60 minutes → 2:00 pm, 3:00 pm, 4:00 pm…
Minimum Scheduling Notice
This controls how soon someone can book:
- 0 hours → They can book instantly, even for the same day
- 24 hours → Clients must book at least 1 day in advance
- 48 hours, etc.
If you require preparation time, set this to at least 1 day.
Set the Booking Date Range
Choose how far in advance someone can schedule:
- Unlimited
- 30 days
- 3 months
- Custom range
This is useful when you prefer to focus on short‑term availability.
Limit Daily Bookings
To avoid burnout, you can set:
- Max bookings per day (e.g., 3 calls/day)
- Max bookings per user (e.g., 1 booking before completing the first meeting)
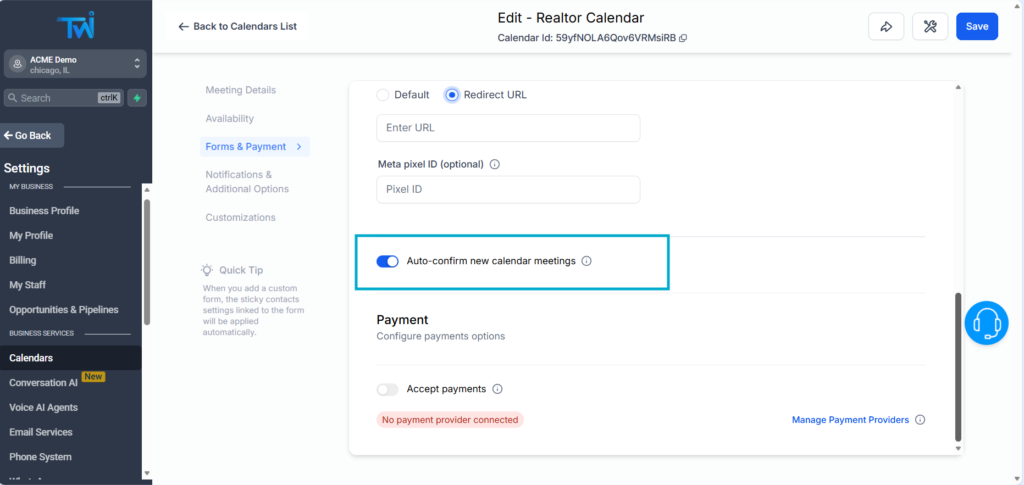
3. Set Form and Payments (Optional)
If you want clients to pay before booking or ask more information to those who book an appointment, you can click on Forms & Payment
Connect a payment mehod is possible, but this requires additional setup, that´s why we have an entire blog postto set payment methods on booking calendars.
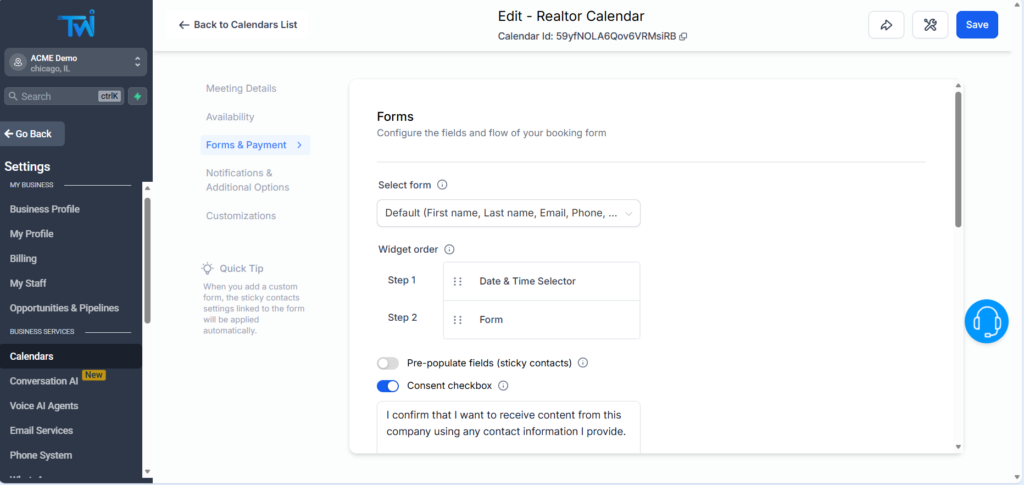
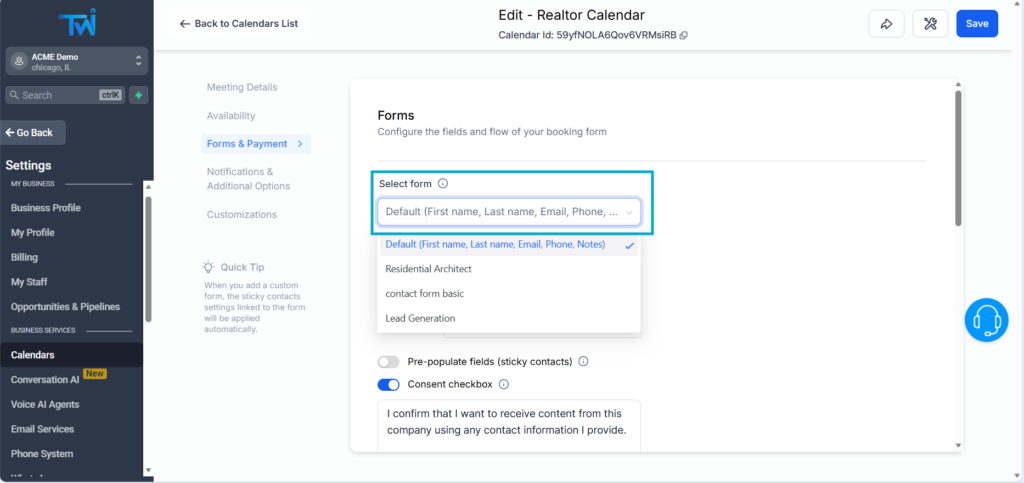
Add Extra Fields (Forms)
By default, TwiLead asks for:
- First name
- Last name
If you need more information, create a custom form and assign it to the calendar.
Customize the Confirmation Page
After a successful booking, a Confimation Page is showed to the client , TwiLead creates a generic Confirmation Page, you can customize:
- The confirmation message, just writing in the text box
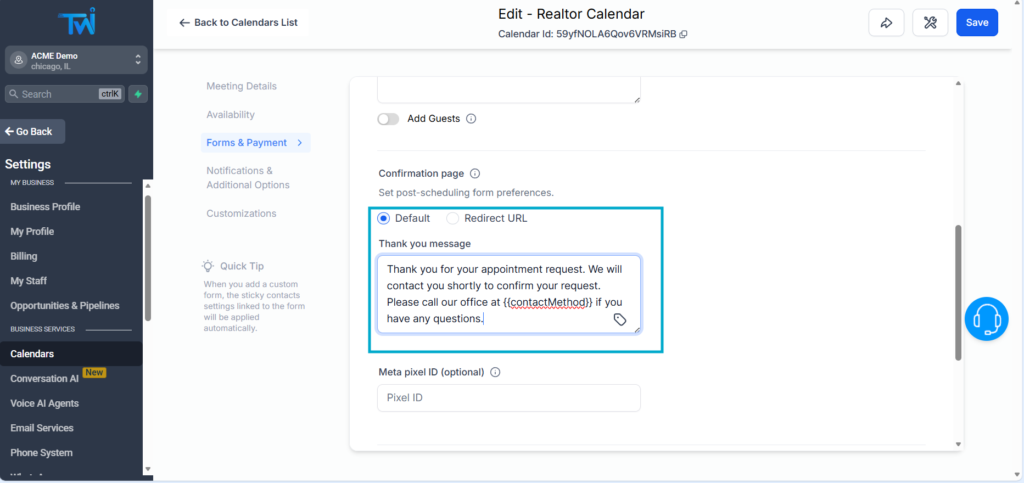
- Add a link to redirect the client to a customized page

Auto‑Confirmation vs Manual Confirmation
By default, bookings are automatically confirmed.
You can disable auto-confirmation if you prefer to manually approve appointments.
4. Set Up Notifications & Reminders
First, go to Notifications & Additional Options
You can configure:
- Notifications for you (the business)
- Notifications for the client
- Notifications for team members
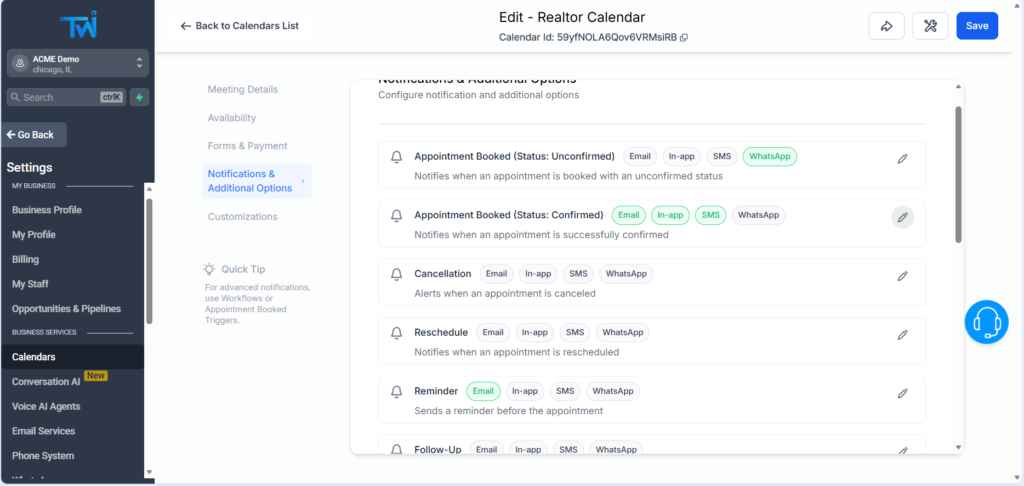
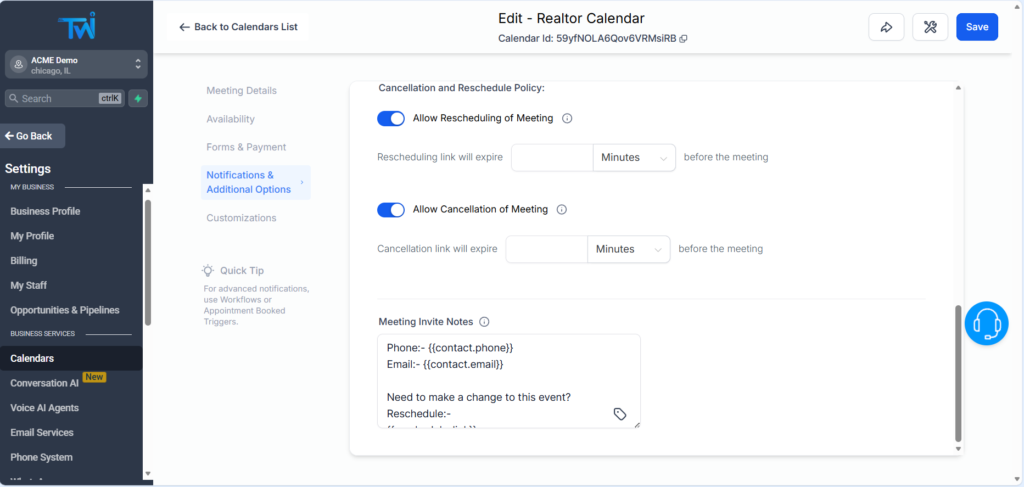
- Allow or deny to reschedule meetings and set boundaries according to your cancellation policies
- Allow or deny cancellation of meetings, and set a time limit to allow cancellations
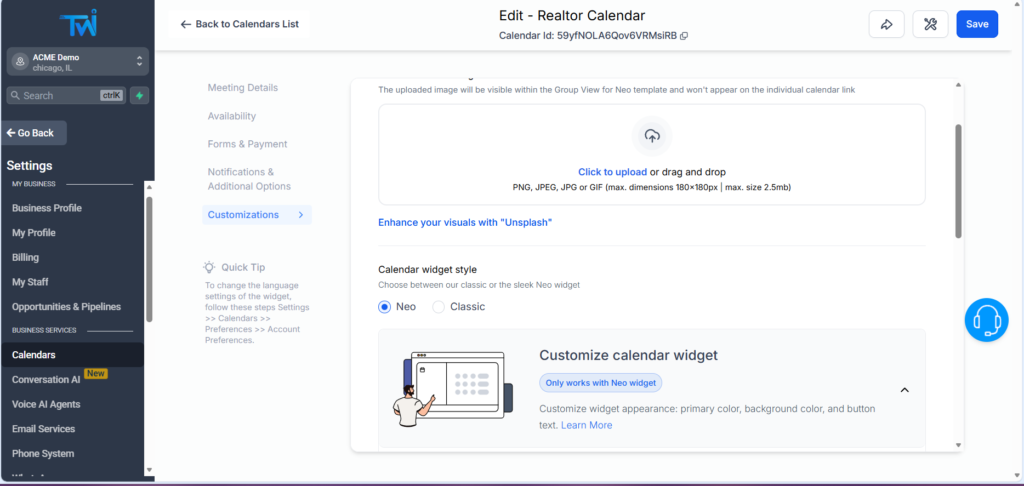
5. Customize the Calendar Appearance
In the Customizations section, you can adjust:
- Cover image
- Widget style
- Background color
- Primary color
- Show or hide calendar description
- Button text
This helps you match the calendar with your brand identity.
Final Thoughts about How to Customize Booking Calendars on TwiLead
You now know how to customize your calendar in TwiLead from top to bottom, availability, appearance, notifications, buffers, form fields, and booking limits. With these settings, you can structure a booking experience that feels professional, clear, and fully tailored to your business.
If you’d like personalized guidance to help you customize your TwiLead calendar and set up a fully optimized lead attraction and conversion system tailored to your business, you can book a 1:1 onboarding call with our expert team. This exclusive support is available only for active TwiLead users and is the fastest way to build a high‑performing client acquisition engine.