Creating your own AI chatbot is no longer a complicated, technical task. With today’s AI tools, you can build a fully functional, 24/7 virtual assistant or sales person in just a few minutes—no coding, no engineering background, no technical setup required-.
In this guide, you’ll learn how to create chatbots from scratch, train them with your business knowledge, and deploy them on your website or communication channels in less than 20 minutes.
Let’s get started.
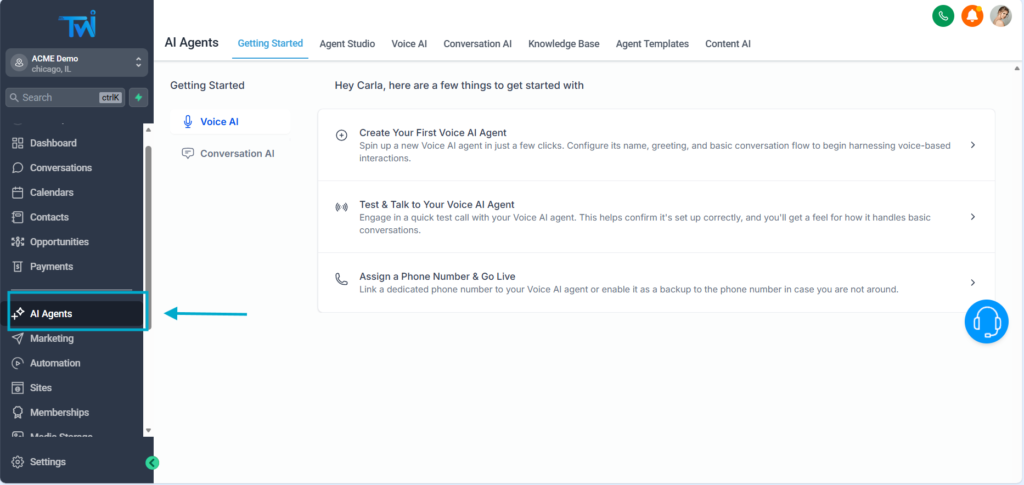
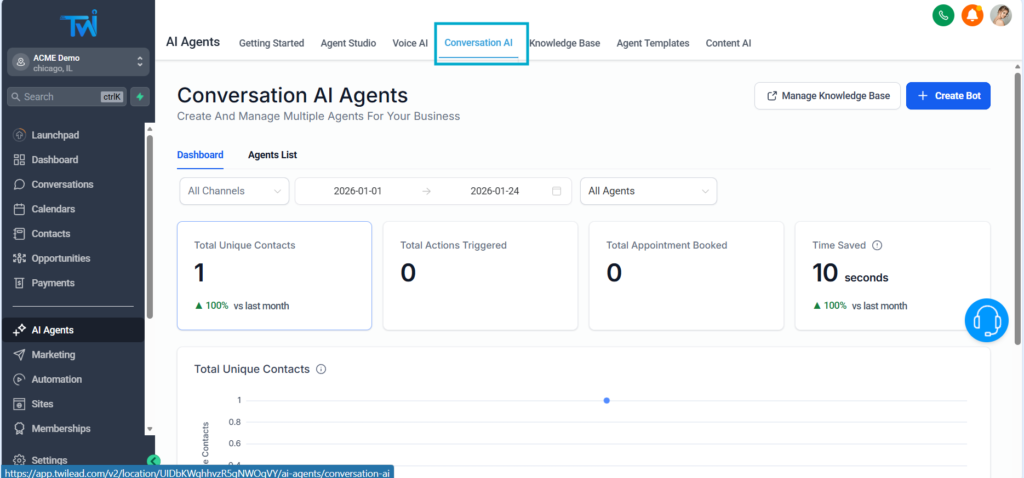
1. Access the AI Agent Builder
From your dashboard, open the sidebar menu and click on AI Agents.
You will see several options:
Agent Studio: Advanced mode for AI experts
Templates: Pre-trained bots, ready to install
Voice AI: Agents capable of answering calls
Conversational AI: Also known as chatbots
2. Create your bot from scratch
Although you can choose a pre-trained model, we will create a bot entirely from scratch so that you understand all the steps.
Click Create bot.

Three options appear. To keep it simple, choose:
➡️ Guided form Setup

This method is suitable for the majority of businesses and sectors.
3. Choose type of chatbot
You have two options:
- Appointment booking chatbot
- Q&A chatbot (general questions)
If your main goal is to get more appointments, choose the appointment booking chatbot.
In this guide, we’ll create a general Q&A chatbot, ideal as a customer service agent.
Click here:
➡️ General Q&A
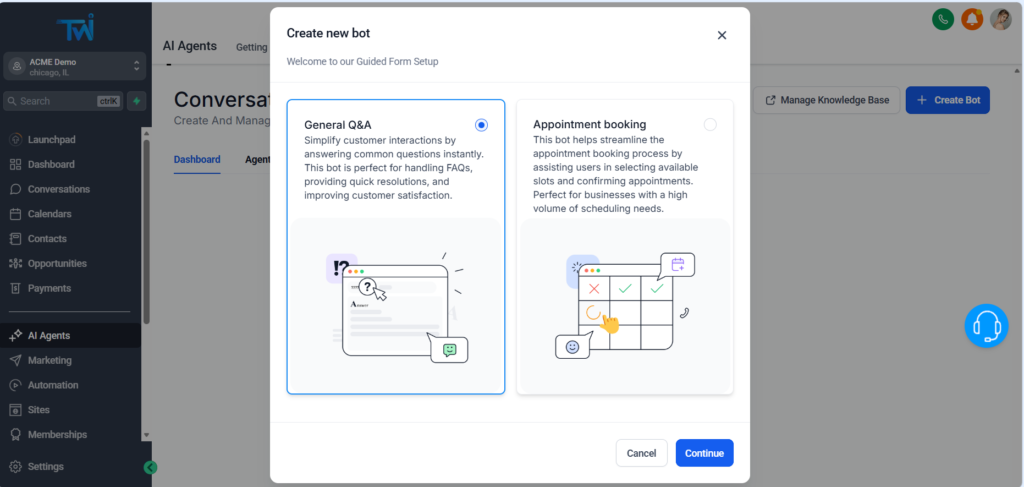
If you’re unsure, choose this default mode: it’s suitable for almost all types of businesses.
4. Define the voice and identity of your chatbot
You will now configure your bot’s “identity”.
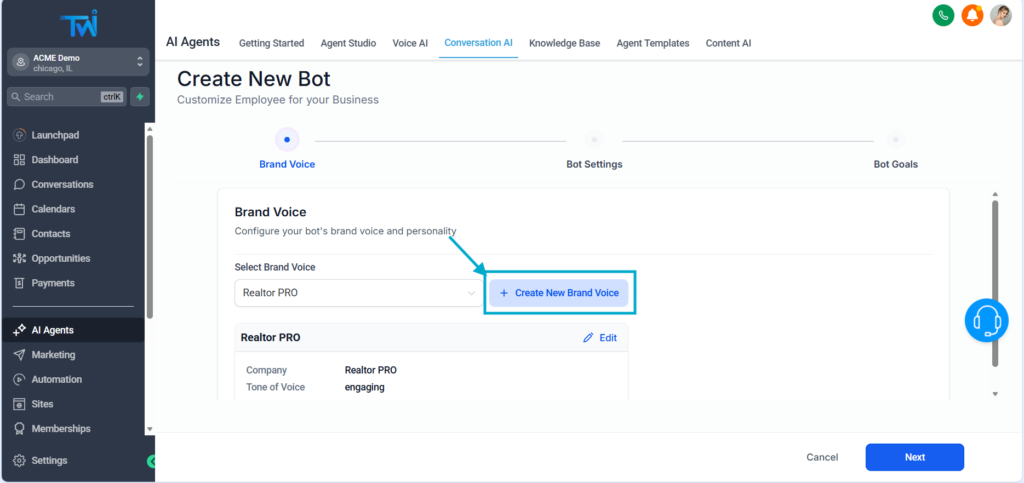
Required fields:
- Brand name
- Tone (friendly, professional, engaging, etc.)
Recommended fields:
- Website
- Additional information about your company
Also choose whether the bot operates:
- 24/7 (default)
- Only during business hours
Click Save, then Next.
5. Name your bot and choose chanels
Give a name to your bot
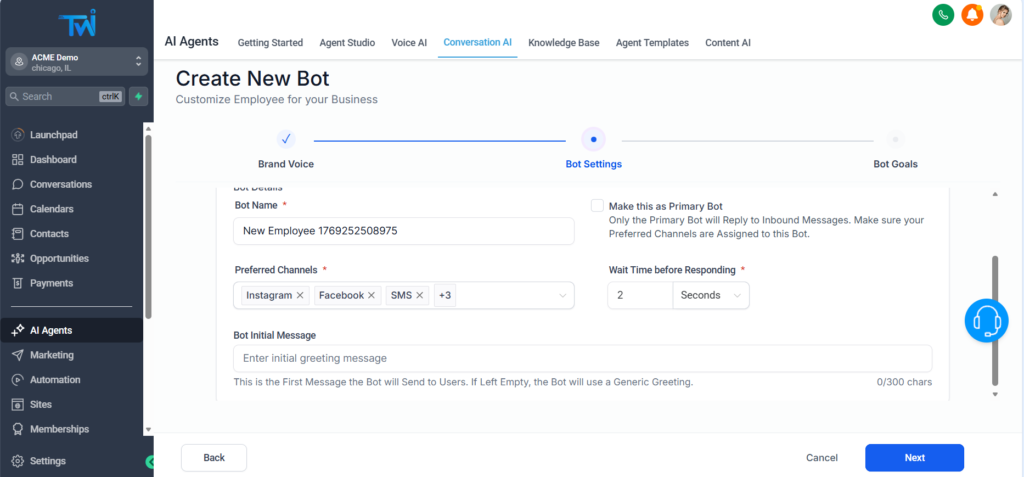
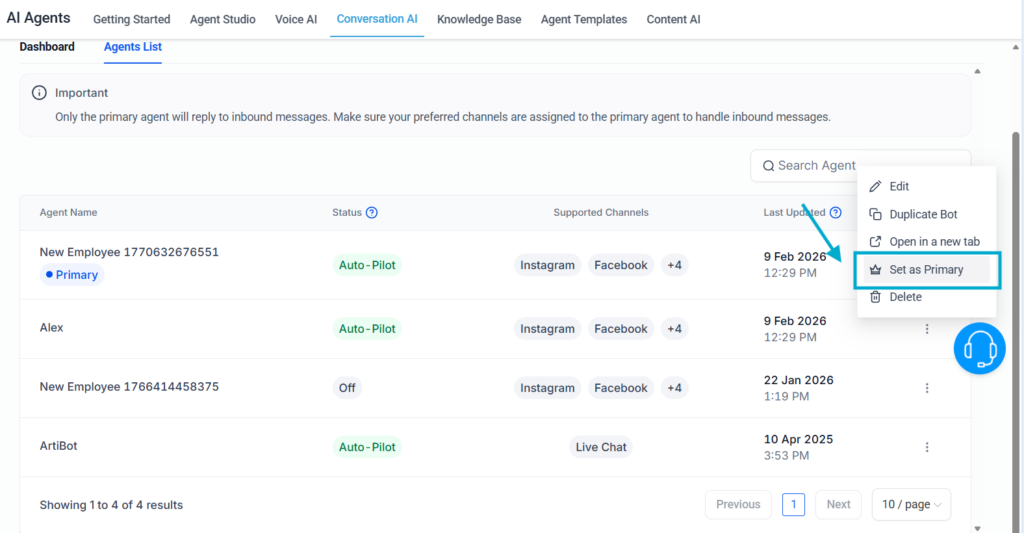
You will then see an option to set the bot as the Primary Bot.
This option is required if you want the bot to automatically reply to all messages.
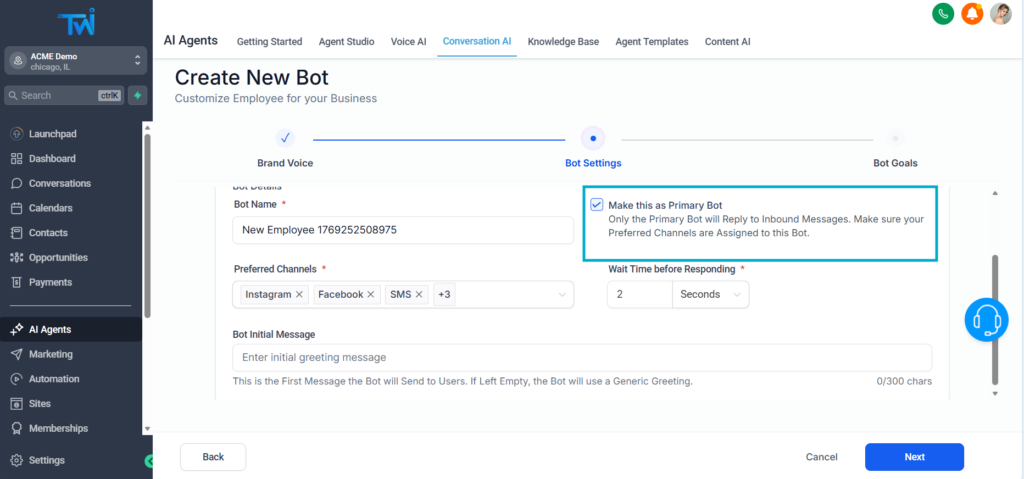
Next, choose the channels where the bot will be active:
- Chat widget on your website
- SMS
- Facebook Messenger
- You can also add a welcome message (300 characters).
Click Next.
6. Choose the information your bot should collect
Your chatbot can automatically retrieve user data and add it to your CRM.
Default fields:
- Name
- Phone
Optional fields:
- Address
- City
- Custom CRM fields (budget, project type, property type, etc.)

You can:
- Enable/disable fields
- Change the order of questions
- Create your own questions
- Map answers to your CRM
- Receive notifications when the bot doesn’t know an answer
Your chatbot thus becomes a true qualification assistant.
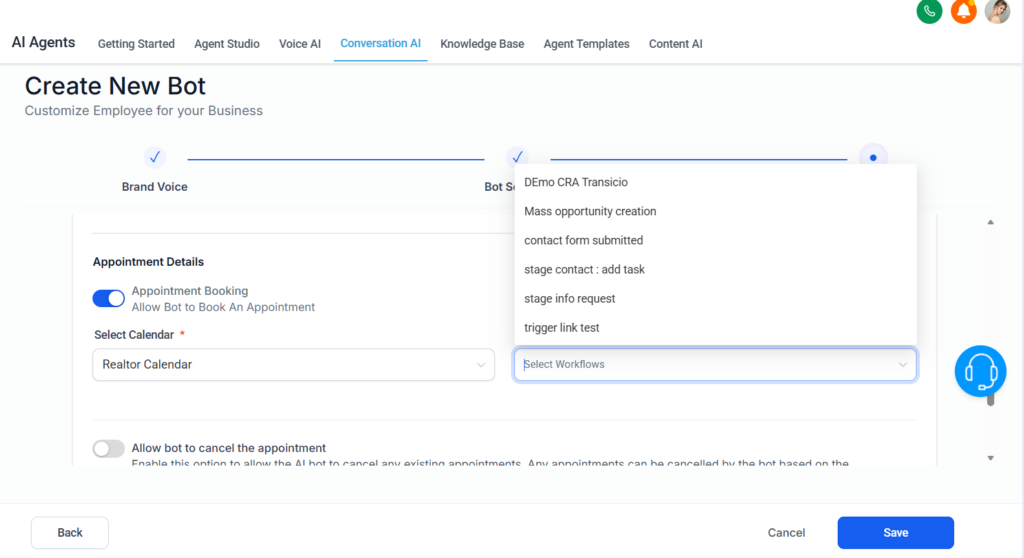
7. Add appointment booking (optional)
If you want the bot to automatically book meetings for you :
- Enable Appointment bookin
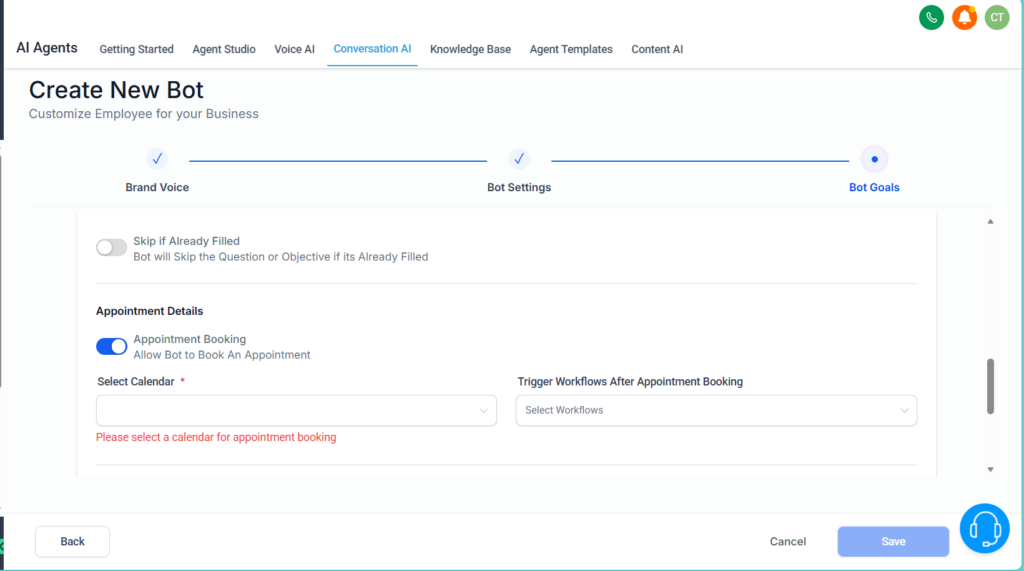
- Select the calendar
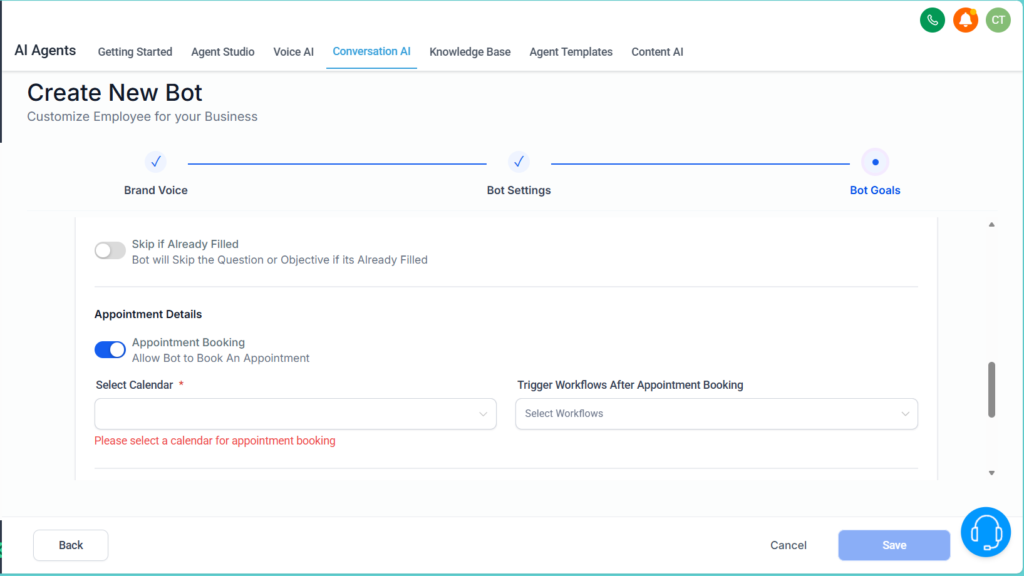
- Choose a workflow to trigger after booking (optional)
- Allow cancellation or rescheduling if you want
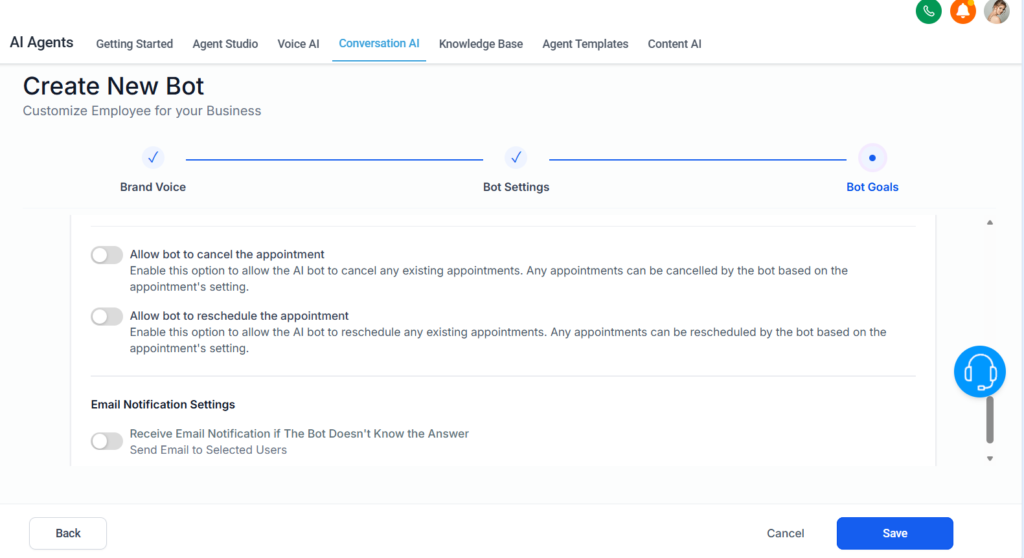
The bot will :
- Suggest time slots
- Book automatically
- Reschedule or cancel
- Update your CRM in real time
8. Train your chatbot with a knowledge base
This is where your chatbot start to really fit your business.
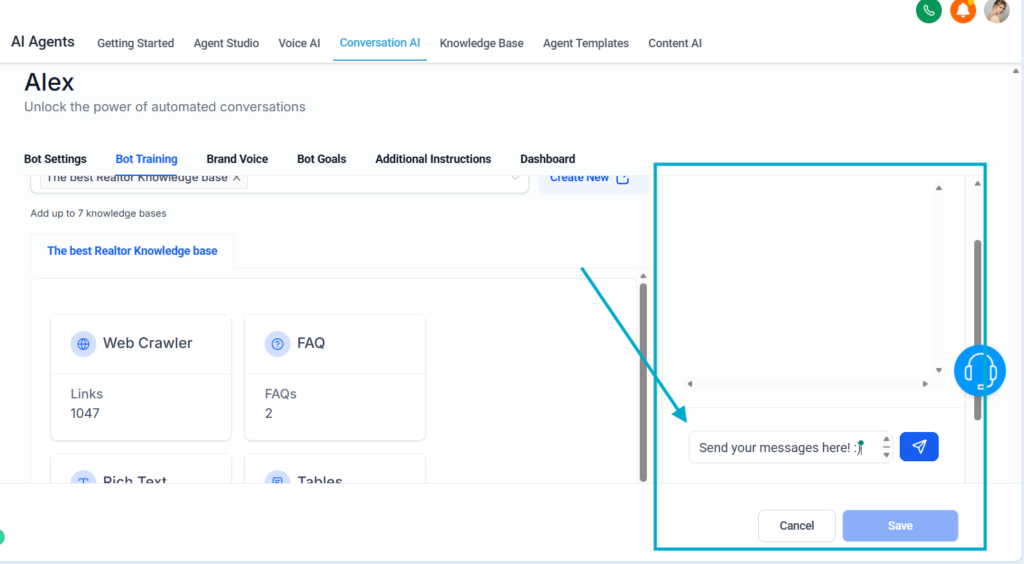
Go in Bot training.
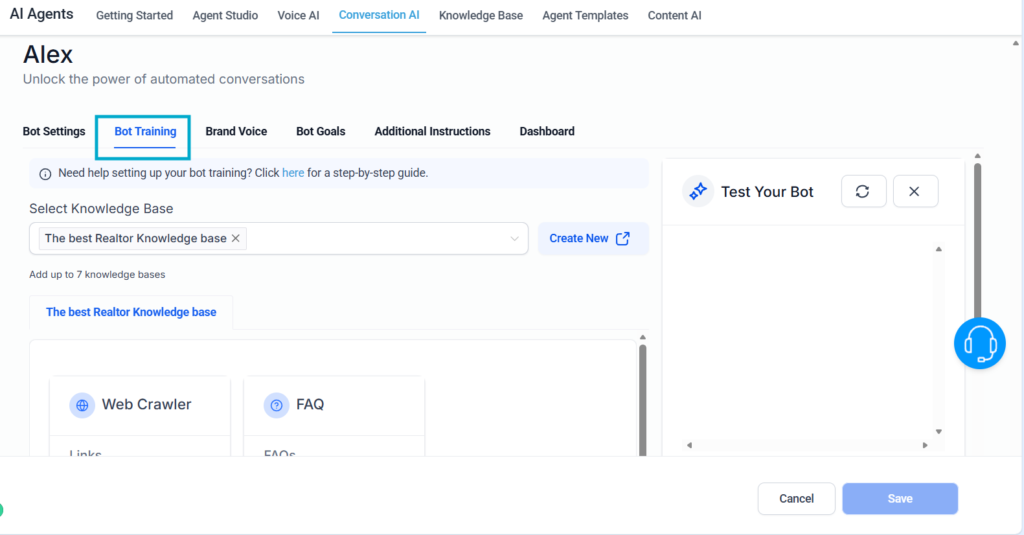
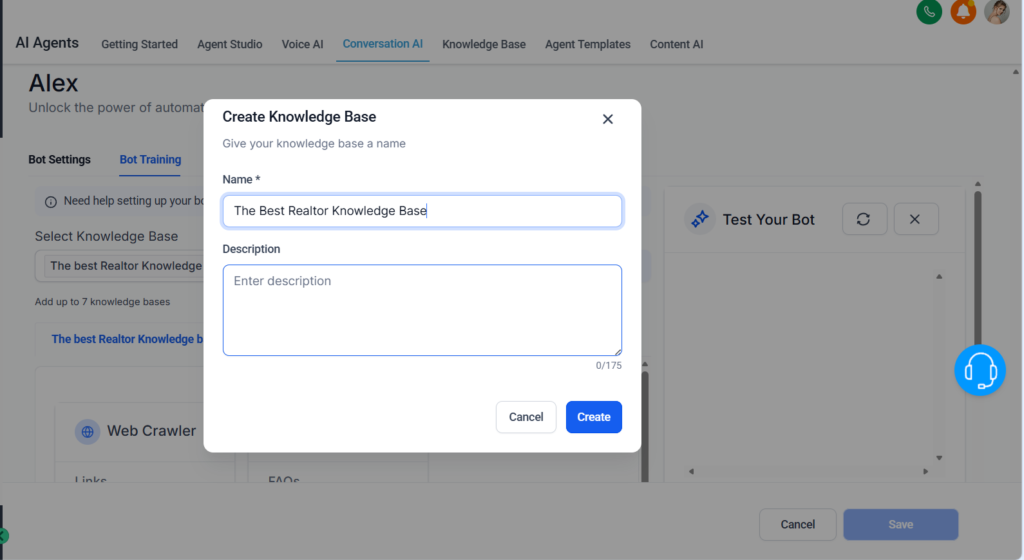
Create a new knowledge base,
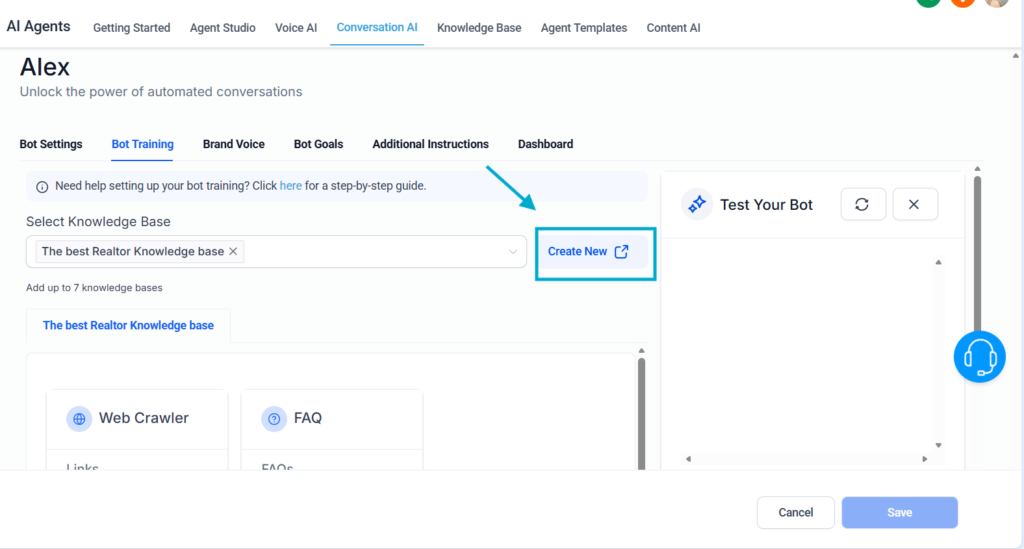
Give it a name
Click Add source.
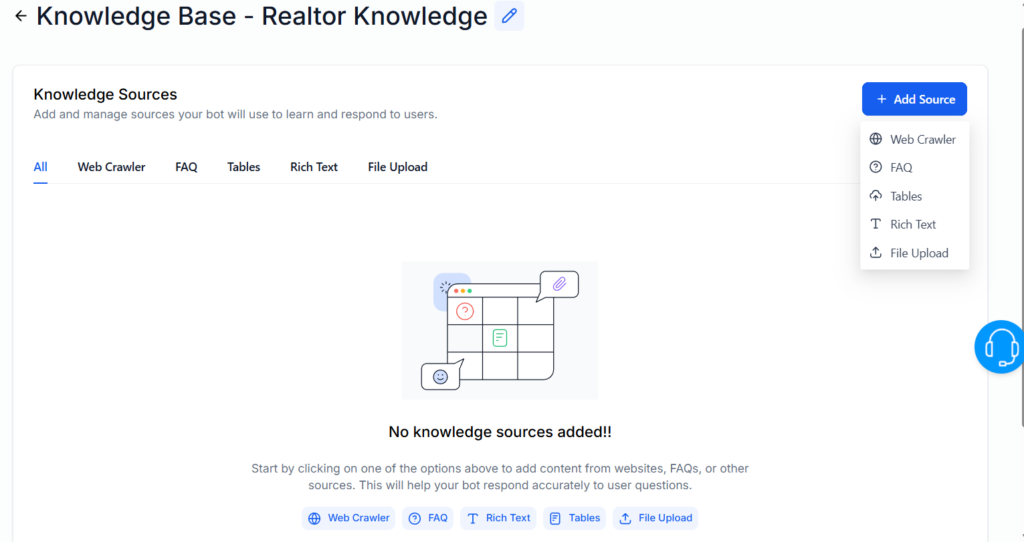
You can train your bot with :
- URLs from your website (automatic analysis)
- Your FAQs
- CSV files
- Plain text
- Catalogs, guides, or internal documents
- PDFs, TXT files, etc.
💡 Tip: prioritize high-quality content that is accurate and aligned with your business.
9. Test your Bot
Return to your AI agent and select your knowledge base.
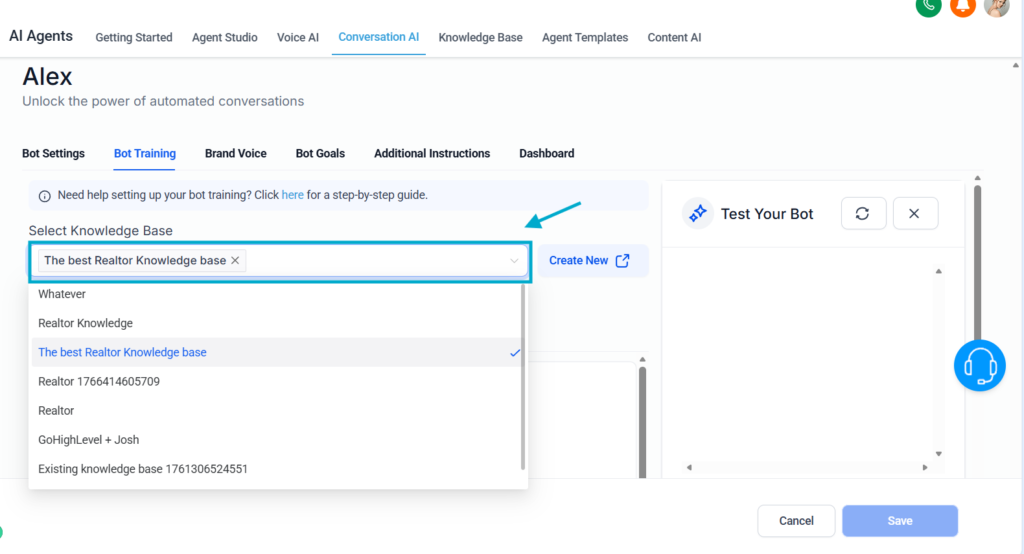
Chat with your bot to test it.
Example :
« What houses are available in Paris for less then 500 000€?»
The bot must answer correctly based on your data.
If it makes a mistake:
- Mark the answer as correct/incorrect
- Adjust your knowledge base
- Add examples
Each test makes your bot more accurate.
10. Deploy your chatbot on your website
Once your bot is ready :
- Make sure it is Primary
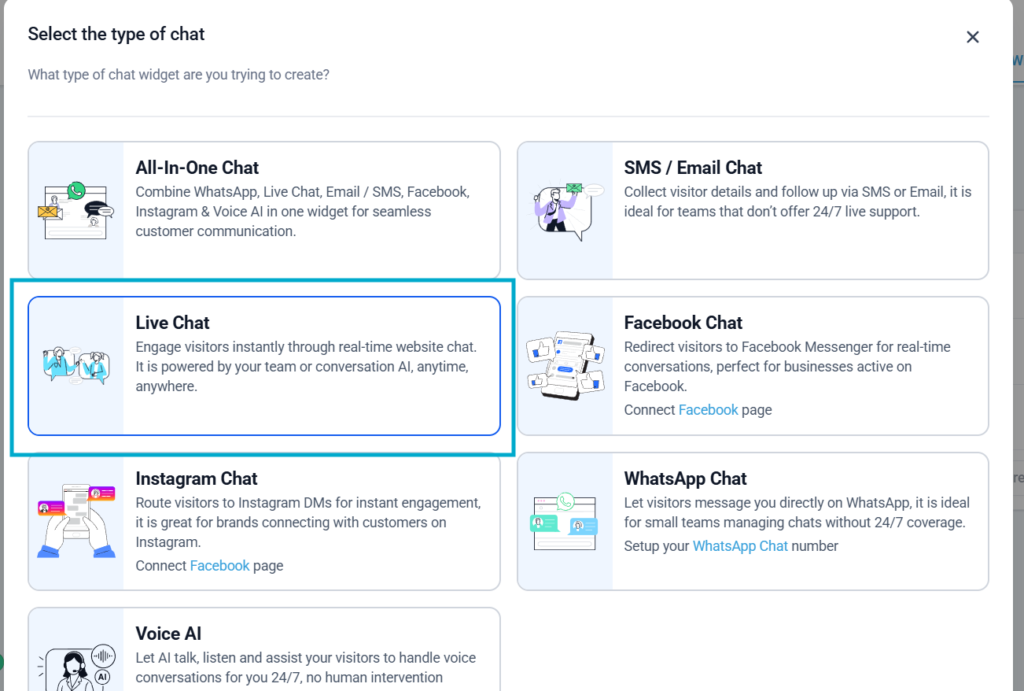
- Go in menu Sites → Chat Widget

- Create a new widget
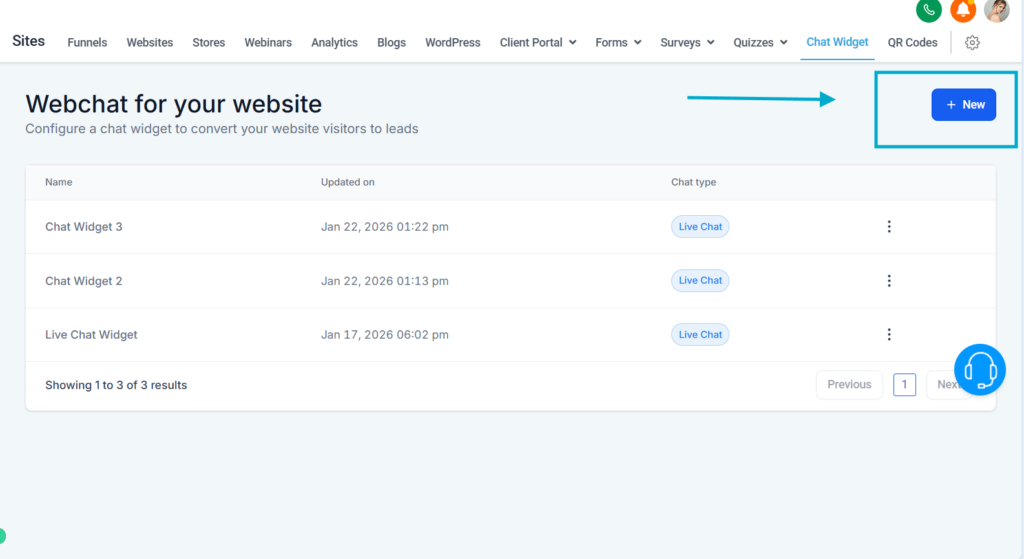
- Select Live Chat
- Click Get Code
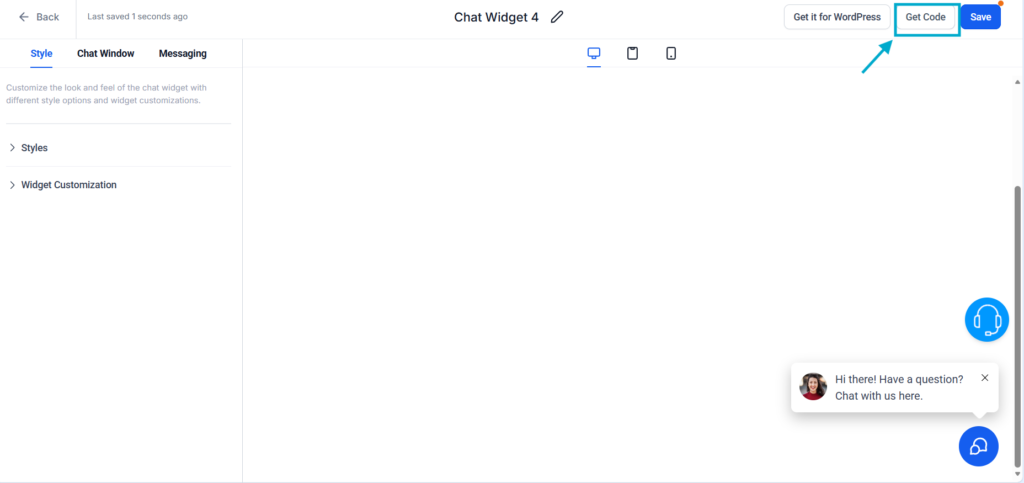
- Copy/paste this code in your website footer or header
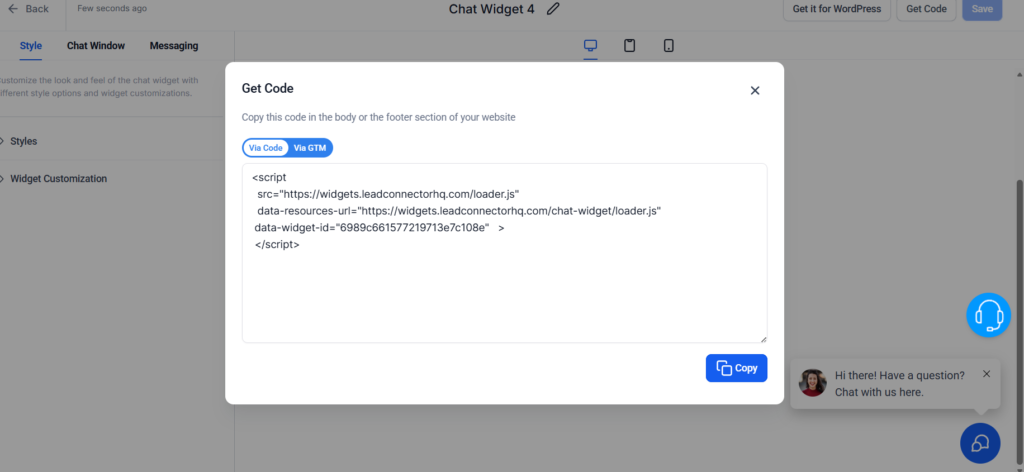
You chatbot is now ready 24/7.
Conclusion
You now know how to create a chatbot from scratch, train it, test it, and deploy it in minutes. Once configured correctly, your chatbot becomes an autonomous assistant capable of:
- Instantly engaging your visitors
- Qualifying leads
- Answering questions
- Booking appointments
- Updating your CRM
Need personalized support ?
If you’d like tailored support to create, train, and optimize your AI chatbot to align with your brand and business strategy, you can book a 1:1 onboarding call with our team of experts.
We’ll guide you step by step to help you launch a high-performing bot quickly.