Importing contacts is one of the most important first steps when setting up your TwiLead account. Whether you’re migrating from another CRM or simply organizing your leads in one place, TwiLead makes it easy to upload, map, and structure your database so you can immediately start automating, nurturing, and converting leads.
This guide walks you through how to import contacts to TwiLead, in an easy way.
Prepare Your Contact File Before Importing
For the import process to work correctly, TwiLead requires the file to be in CSV (.csv) format. CSV helps prevent formatting errors and ensures all your data is read properly during the import process.
✔ File Requirements
Before importing, make sure that your CSV:
- Uses CSV UTF‑8 encoding (prevents character issues with accents or symbols).
- Has a header row (e.g., First Name, Email, Phone, etc.).
- Has one contact per row.
If your file includes custom fields, make sure those fields are created in TwiLead beforehand.
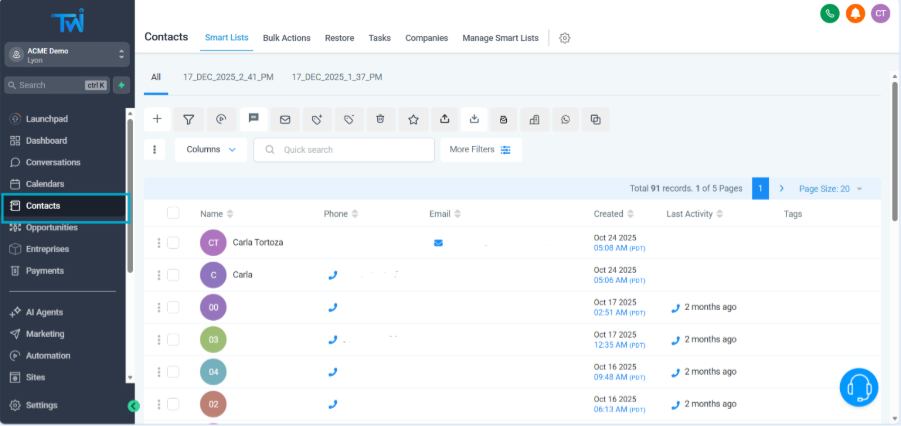
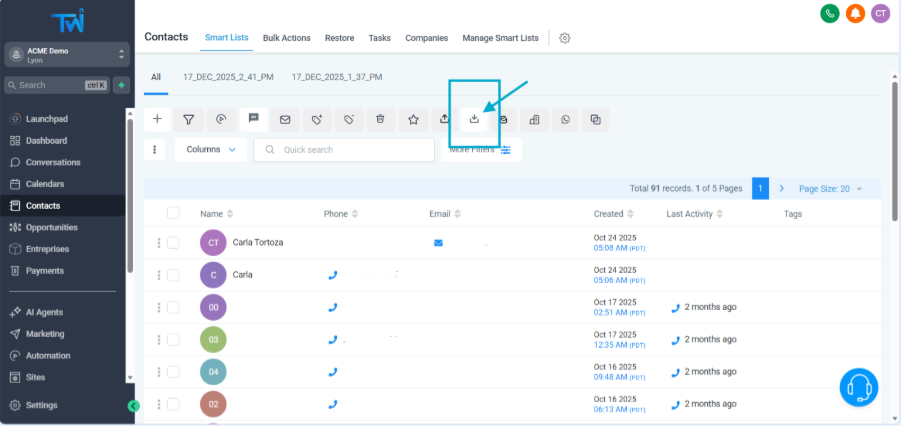
Step 1: Open the Contacts Section
Inside your TwiLead workspace:
Go to Contacts → Import Contacts
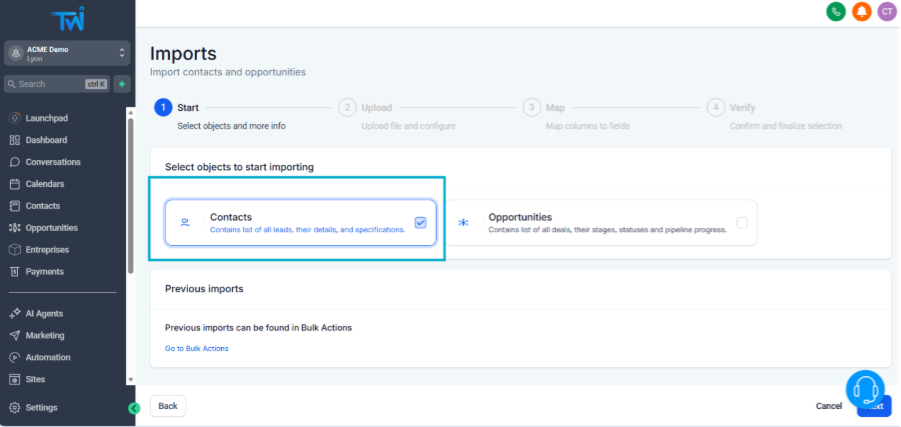
Step 2: Choose What You Want to Import
Depending on your account settings, TwiLead may allow you to import:
- Only Contacts, or
- Contacts + Opportunities (if you want to import to your pipelines at the same time)
If you include opportunity‑related fields in your CSV, TwiLead will automatically match and assign the data during the import. However, if you are a new user, we recommend to start just importing Contacts.
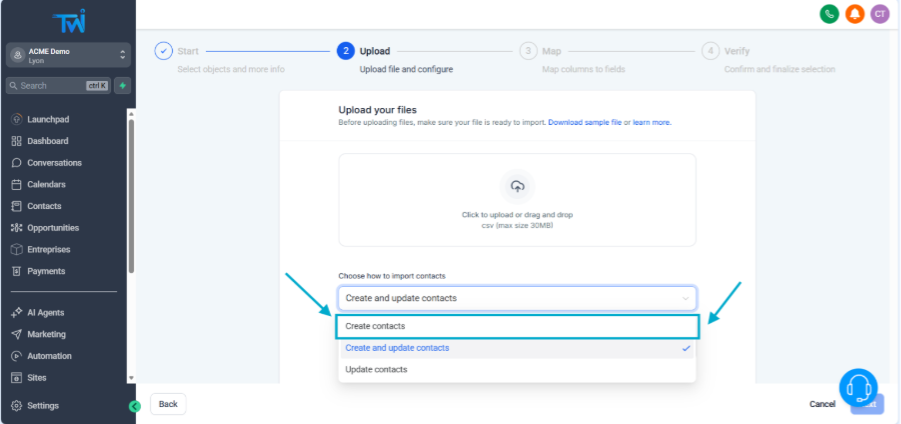
Step 3: Upload Your CSV File
Click Upload File or drag your CSV into the upload area.
TwiLead will show you a preview of the data to confirm everything looks correct.
During upload, you will be asked whether you want to:
- Create new contacts,
- Update existing ones, or
- Create & update at the same time
If you are a new user and you don´t have data at your TwiLead account yet, you should choose the option Create new contacts.
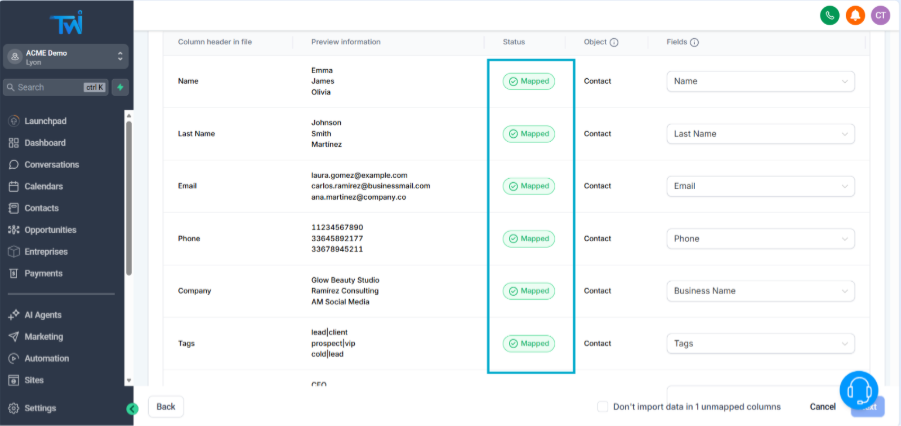
Step 4: Map Your CSV Columns to TwiLead Fields
This is one of the most important parts of the process.
TwiLead will automatically detect your column headers. If all the columns are “Mapped”, you can continue to the next step. Otherwise, you can map them manually.
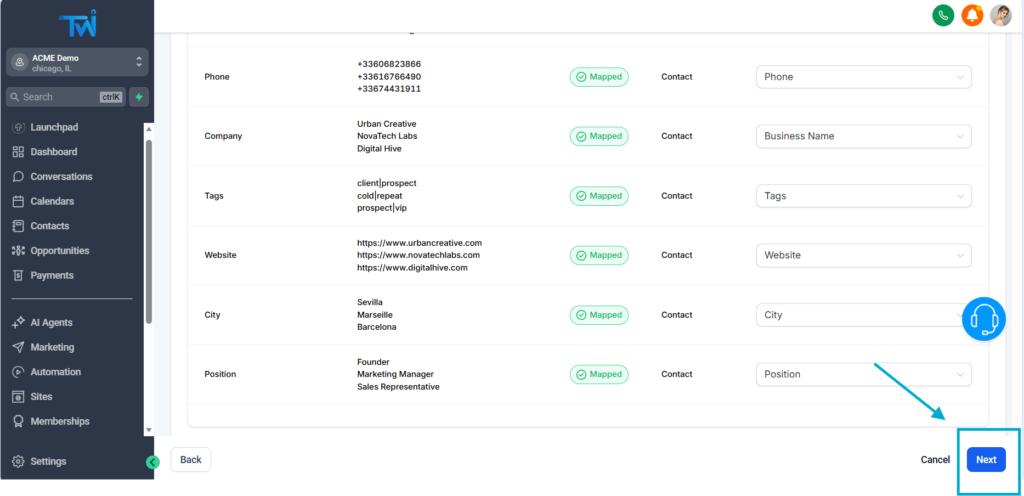
Step 5: Review and Confirm the Import
Before finalizing the import, TwiLead will show you:
- How many contacts are about to be imported.
- A summary of the mapped fields.
- FIelds assigned
This is the perfect moment to ensure your data is correct.
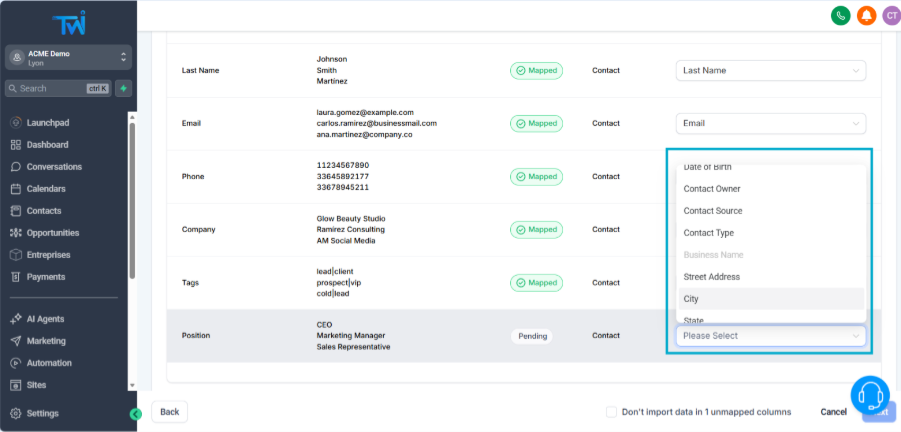
Important notes:
- Review each row to ensure the field matching is correct.
- If something is misaligned in the wrong field, you can manually select the correct field from the dropdown (as shown in the image).
- If your CSV includes additional custom fields you can create them in TwiLead before doing the import.
Click Next to proceed.
Step 6: Track the Import Progress
After submitting the import, TwiLead will process the data and show your progress in real time.
You will be able to see:
- Completed imports
- Any rows that produced errors
- Duplicates detected
- Missing or invalid information
You can download the error log if needed to correct issues and re‑import only the failed rows.
When the process is done, you will find all your new contacts in the “Contacts” section.
Common Mistakes When Importing Contacts to TwiLead
Avoid these issues to keep your import process smooth:
❌ Missing or incorrect column headers
Make sure the first row has clear titles such as Name, Email, Phone, etc.
❌ Invalid phone number formatting
Avoid spaces, parentheses, letters, or special symbols not accepted by your region.
❌ Blank mandatory fields
At least one unique identifier (phone or email) should be present.
❌ Duplicates rows
Clean your list before uploading.
Final Thoughts
Now that you know how to import contacts to TwiLead, you can centralize your entire customer database, organize your leads, and activate automations, all from a single upload.
A clean CSV, correct field mapping, and a well‑structured import process will give you accurate data and save you hours of manual work.